
There are different ways to mute students in the channels. You can set a channel so that no one except for the owner can speak and also mute specific individuals.
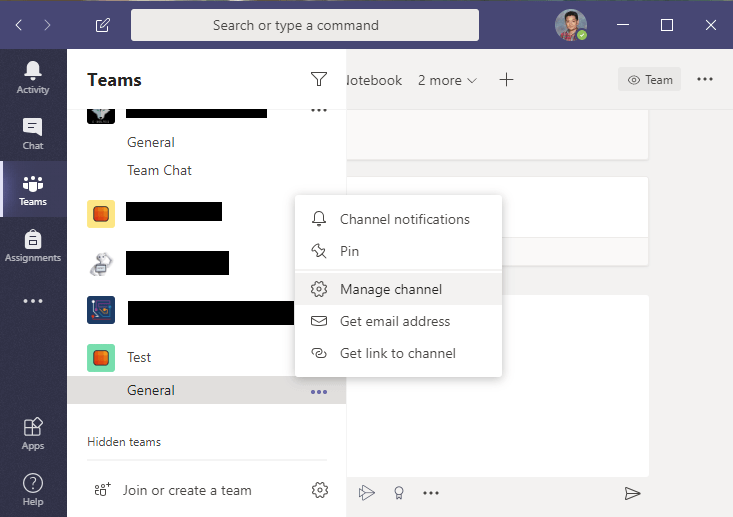
First we will go over how to mute an entire channel. For example, this is useful for channels that are meant for announcements. Click on the three ellipses next to the channel and select Manage Channel.
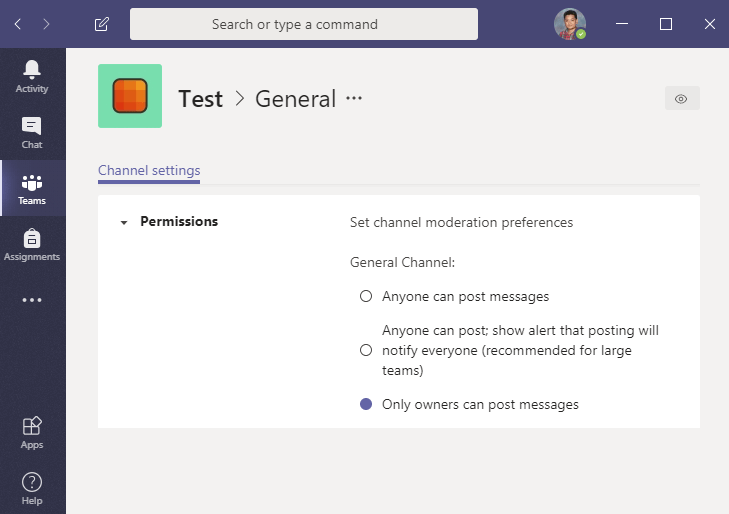
In the next menu, select Only Owners so that your students can not post messages in that channel. Keep in mind that students will be able to react to any posts you make.
If you want to only mute specific students. Click on the ellipses next to your Team and select Manage Team.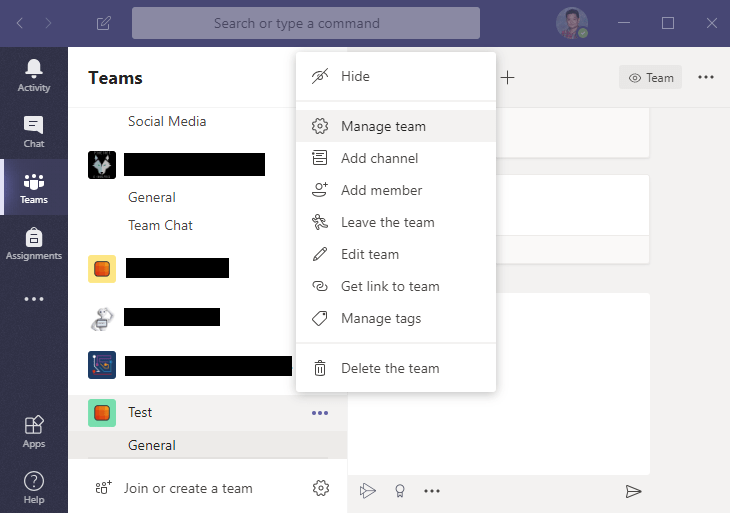
From there you will see a list of all the members of your Team. To mute them, check off the box under the Mute Student column. You can unmute them whenever you want.
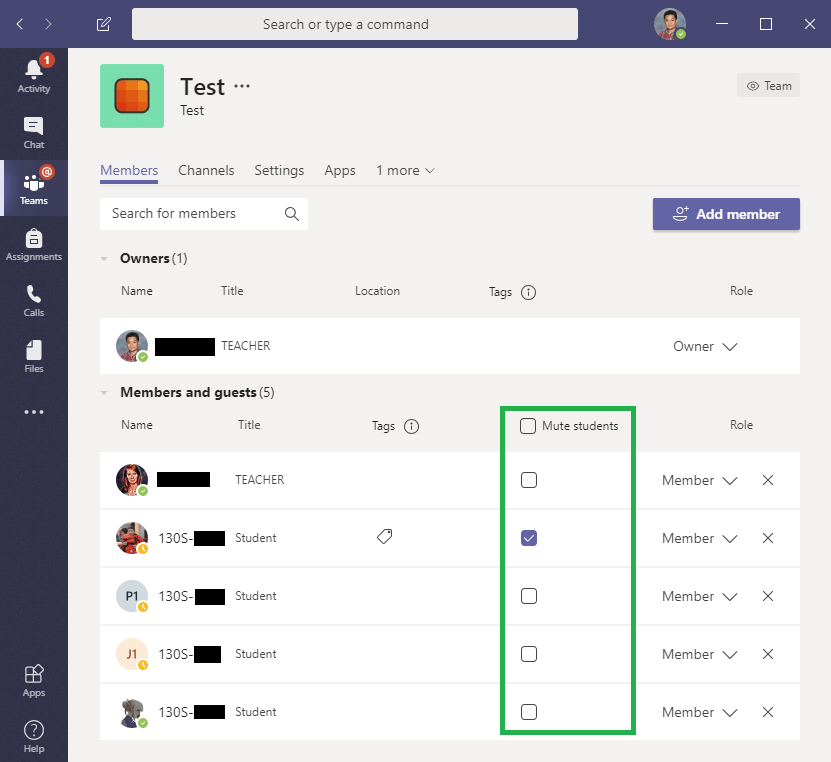
Similar to the first option, muted students can also react to posts still.
Congratulations! You’ve learned how to mute students in your channels!
You can now return to the Tutorial Directory to repeat a lesson or browse other guides.
Do you have any questions? Leave a message in our discussion forum. Note that these forums are viewable to the public, but require an Edublog account to post.
Please take a moment to provide some anonymous feedback below!